Burger's Guide to Making Map Art
Having made a lot of Map Art myself, I've noticed many people overestimate how difficult it is. Making map art is time-consuming and resource-intensive, but it's something anyone can do with relative ease. All my map arts are shown here.
This guide will take you through installing Litematica, converting an image into a buildable structure, and building it in-game. I hope this guide is easy to follow and will make map art creation more accessible.
Even if you're already familiar with Litematica and producing map art, you might still benefit from reading the final section.
Installing Litematica
This guide makes use of Litematica. Essentially, this mod shows you exactly where to place what blocks, and is crucial for making detailed, complex map art.
I will explain how to install Litematica with Fabric, but if you'd prefer to use an alternative you're more familiar with, like Forge or Rift, then feel free.
While it is just one mod, it requires a few other files to work.
Download Fabric
Download and run the Fabric installer (Universal/.JAR), found at https://fabricmc.net/use/
Make sure you select the correct Minecraft version, and click Install.
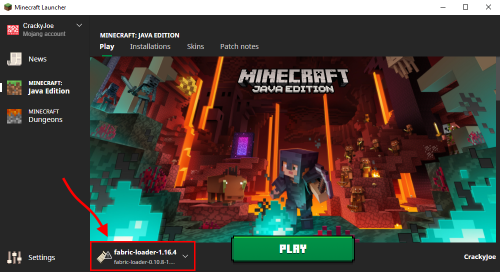
Now, open the Minecraft launcher and select the profile named fabric-loader-xyz, and run Minecraft once.
This will install the necessary files. Once you've loaded Minecraft once, close it.
Navigate to your .minecraft folder - there should be a newly-created "mods" folder.
Now, place the same Fabric .jar you just downloaded into this new folder.
Download Fabric API
Download the latest Fabric API .jar for the current Minecraft version, found here: https://www.curseforge.com/minecraft/mc-mods/fabric-api/files
Simply place this .jar into your .minecraft/mods folder.
Download MaLiLib
Just as you did with Fabric API, download the latest MaLiLib .jar at https://www.curseforge.com/minecraft/mc-mods/malilib/files
Place this .jar into your .minecraft/mods folder.
Download ModMenu
Download the latest .jar at http://curseforge.com/minecraft/mc-mods/modmenu/files
Once again, place the file into your .minecraft/mods folder.
Download Litematica
Finally, you've installed all the other bullshit and you can actually download the mod itself.
Download the latest .jar at https://www.curseforge.com/minecraft/mc-mods/litematica/files
Place it with all the others in your .minecraft/mods folder.
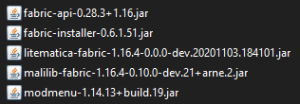
By now, your .minecraft/mods folder should look like this:
Run and close Minecraft once again - this will create a .minecraft/schematics folder, which you'll use later.
Generating your map art
To get started making the image of your choice into a map art, you'll need to convert it into a buildable schematic file.
For this, I highly recommend https://rebane2001.com/mapartcraft/ - below I'll outline how to use it.
Adjust settings
First, select the right settings:
- Under Block selection, select Everything
- Under Settings, change the following:
- Version - select whatever version SimPVP is currently on.
- Staircasing - select Off (2D), unless you want to create a staircased map art, which is far more complex - see FAQs.
- Dithering - Floyd-Steinberg is usually the best, but it depends on your type of image - ‘None’ might suit a cartoon better, for example.
If you're making a larger, multi-map piece, change the Map size setting.
Upload your image
Simply click the big green "Pick image" icon and upload the picture you'd like to build.
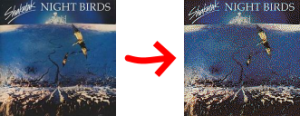
This will show you how your image will look as an in-game map.
Change materials
Under Block selection, you're able to change which materials your art will be built from.
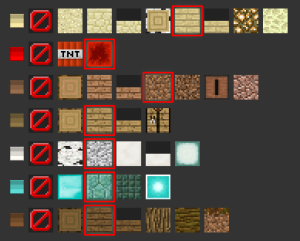
Blocks on the same row will look the same on a map, so you'd ideally select cheaper alternatives to the default.
Below are the ones I personally change:
Generate material list
Click Refresh Materials, and it'll generate a list of all the blocks you'll need.
Optionally - if there's too many of a material you can't afford - you could try removing it and generating a new material list.

Make sure you click Refresh materials again before downloading.
Download your map art
Once you're satisfied with the previewed image - and the material cost - click Download.
Place the downloaded .nbt file in the .minecraft/schematics folder which should have been created after you installed Litematica.
Building your map art
By now, you should have installed Litematica and downloaded a schematic of your map art.
Locate where to build
Of course, you can build your map art anywhere you want, but it must fit perfectly into an in-game, 128x128 map.
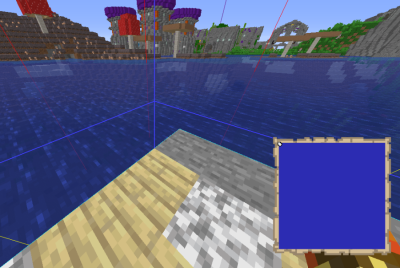
Use a map where you intend to build, and fly to the top-left (north-west) corner of the map.
Press F3+G to view the chunk borders to ensure that you're in the exact corner.
Load your schematic
Once you're in the corner of the map, press M. This will open the Litematica menu.
Then, click Load schematics, and load in your downloaded map art .nbt file.
Move your schematic
To move your loaded schematic manually, equip the Litematica 'tool' (by default, a stick).
Once you're holding your tool, options will appear at the bottom of your screen. Hold Ctrl and scroll to cycle through them.
Select Move schematic, and face the direction you'd like to move it. Hold Alt and scroll to move the schematic.
IMPORTANT NOTE: Your map art schematic will have a line of stone at the top. Make sure this line is 1 block north of (outside) the map's 128x128 area. It should not be visible on the map. If you're curious what this line is, see FAQs.
Make building easier
Your map schematic is now loaded in the world, and you can see exactly where to place which blocks. Simply place blocks where it shows you to, and track your progress by looking on a map.
You're now ready to create your map art. However, Litematica has a number of optional ways to make building much, much easier.
The below settings are optional, but they're greatly recommended to make map art creation far quicker.
pickBlockLast
Press M and go to Settings. Under Hotkeys, you can change pickBlockLast to BUTTON_2 (right-click).
With this enabled, right-clicking a block in your schematic will automatically place the correct block into your hand. This saves you the effort of constantly selecting the right material from your inventory.
easyPlaceMode & easyPlaceHoldEnabled
Press M and go to Settings. Under Generic, enable easyPlaceMode and easyPlaceHoldEnabled.
With these enabled, you can simply hold down right-click and look at your schematic. It will automatically place the correct blocks in the right places, and make it impossible to misplace blocks. These settings are highly recommended.
You are not allowed to exploit this feature to place blocks on air. See FAQs.
openGuiSchematicVerifier
Under Hotkeys, set this to whichever key you like - I use V.
This feature, called the Schematic Verifier, should be used once you're done. It will highlight - through blocks - any misplaced or missing blocks.
Material List (and Render Layers)
Press M+L to view the materials you will need to fill the incomplete areas.
In Settings, under Render Layers, I personally render a Layer Range of five or so layers at a time, so I always have just enough materials in my inventory to complete the next part.
FAQ
These questions aren't actually frequently asked because I just made this guide.
Q. What is staircasing (3D)?
A. On a map, a block is either a shade darker or a shade lighter depending on if the block north of it is on a higher or lower y-elevation. This mechanic can be exploited to enable triple the colours in a map art. Google some staircased map arts - as you can see, the level of detail is far greater, but the complexity makes it effectively impossible in vanilla Minecraft.
Q. What is the line of stone at the top of my schematic?
A. Due to the mechanics behind staircasing (see above), not including this line will make the top of your art a shade lighter or darker than the rest. See the Donald Trump map art - if you look closely, the top line of pixels is a shade too light as the creator STUPIDLY forgot this line of blocks.
Q. Can I use easyPlaceMode to make staircased map art?
A. No. An exploit allows you to place loaded schematic blocks on air, thus making staircased art feasible. However, this non-vanilla feature is not allowed as the server owner believes the immense complexity of creating such pieces is what makes them impressive. You will be jailed if you use easyPlaceMode to place blocks on air.
Q. Does rebane2001.com list all possible blocks?
A. Unfortunately not. While the tool is incredibly helpful, one issue is that it does not include Mushroom stems as a cheaper, farmable alternative to Cobwebs. For a fuller list of blocks and their corresponding colours, see https://minecraft.gamepedia.com/Map_item_format#Base_colors
Q. Can I edit the schematic once it's loaded?
A. Yes. As noted above, you might want to change Cobwebs to Mushroom stems, for example. Under Hotkeys, set schematicRebuildReplaceAll to something - I use M+O. With your tool, select Rebuild schematic. Then, hold the block you would like instead - Mushroom stems in this example. While holding your hotkey (in my case, M+O), right-click the block you would like to replace (Cobwebs). This will change all Cobwebs to Mushroom Stems. Finally, go to Loaded Schematics and click Save to File to save this change.
You can also remove every instance of a certain block, by setting a schematicRebuildBreakPlaceAll (I use M+K). With Rebuild schematic, hold the hotkey and left-click the block you want to remove.
You can also place or remove individual blocks by simply left- or right-clicking with Rebuild schematic.
Q. Can I use Optifine alongside Litematica?
A. Yes, place the latest Optifine .jar and the latest Optifabric .jar, found here: https://www.curseforge.com/minecraft/mc-mods/optifabric, in your .minecraft/mods folder.
Q. Can I use a program/mod that automatically places ("prints") the schematic for me?
A. No, this is against the rules. You will need to place every block manually.
If you've got any more questions, message me in-game or on Discord.
